
AI Video Cut Regeneration Feature: Everything You Need to Know
Create multiple short clips from the same video without re-uploading.

AI notice: This feature uses AI technology to process your video files.
Updated: June 2026
If you’ve ever made a clip with AI Video Cut, watched the preview, and thought “Maybe this video would’ve worked better as a product ad instead of a recap”, the Regeneration feature is here to save the day.
This powerful tool lets you reprocess your video using different prompts, styles, and settings, all without uploading the video all over again. Whether you want to test multiple formats, fix captions, or explore new creative directions, Regeneration gives you the freedom to iterate until you’re happy with the result.
Here’s a complete guide to how Regeneration works and how to use it effectively.
What Is Regeneration in AI Video Cut?
Regeneration is essentially reprompting: it allows you to apply a new prompt (and change any other settings like aspect ratio or subtitle style) to a video that’s already been processed. You don’t need to upload or link the original video again, as AI Video Cut saves it for you, ready to be reshaped into something new.
Why Regeneration Is Useful
- You avoid re-uploading and skip the wait and hassle of uploading again.
- You can test different formats and try out various output types to see what resonates most.
- You can perfect your clip by adjusting aspect ratio, subtitle style, clip length, or speech language settings without starting over.
- You can create multiple clips from the same source, which is great for content batching or social media A/B testing.
How to Use Regeneration: A Step-by-Step Guide
Follow these simple steps to regenerate your video.
Step 1: Go to AI Video Cut and sign in to your account.
Step 2: Upload a video.

You have two options:
- From local files: Upload any video under 2GB and 30 minutes (free) or up to 3 hours (Pro users).
- From multiple sources, including YouTube, Reddit, Instagram, Zoom, Twitch, Dailymotion, Facebook, Google Drive: Paste a public, age-unrestricted video link (no playlists or channels).
Step 3: Once you uploaded the video, adjust the settings for the output clip:
- Select an output video type (Viral Clips, Show Highlights, Funny Moments, Product Review, Trailer, Music Highlights, Sports Highlights, Gaming Highlights) or opt for the Auto mode.
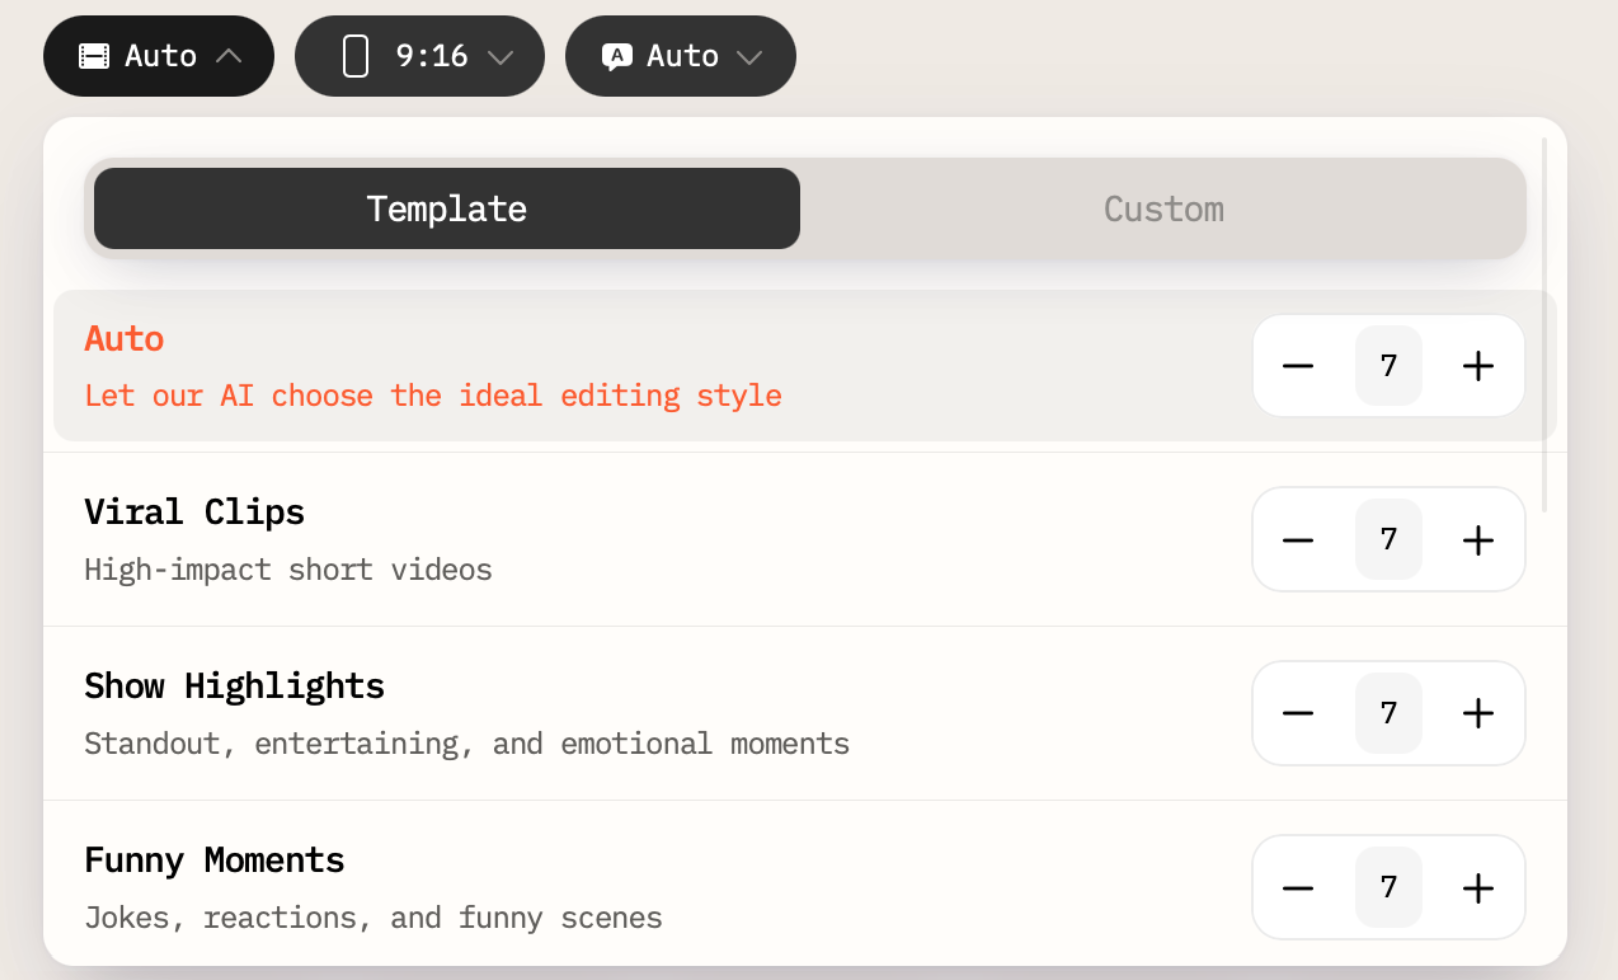
- Choose Clip length (if applicable).
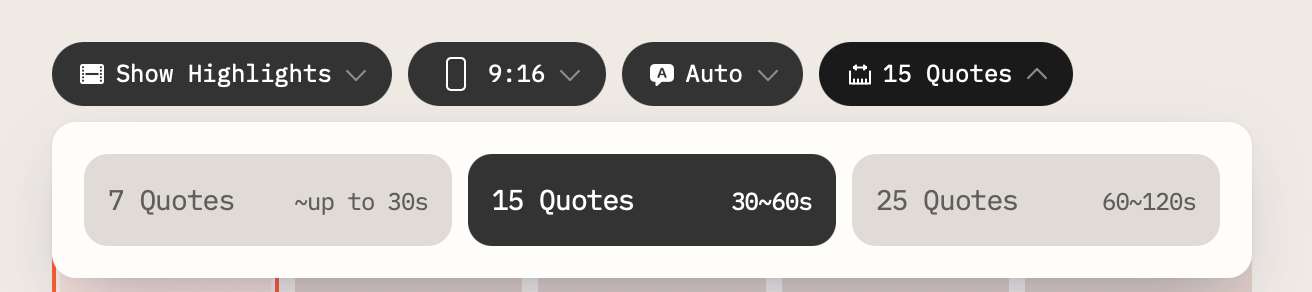
- Pick the aspect ratio (e.g., 9:16 for TikTok, 1:1 for Instagram).

- Select the number of clips you want AI Video Cut to create (up to 10 for all types except Trailer).
- (Optional) Enable captions and select their style.

- (Optional) Choose the speech language (set to Auto by default).
Step 4: Click Submit. After processing, review the generated clip and transcript. If it works, great! If not... head over to the next step.
Step 5. Find your video in the Dashboard and click Open Project it.
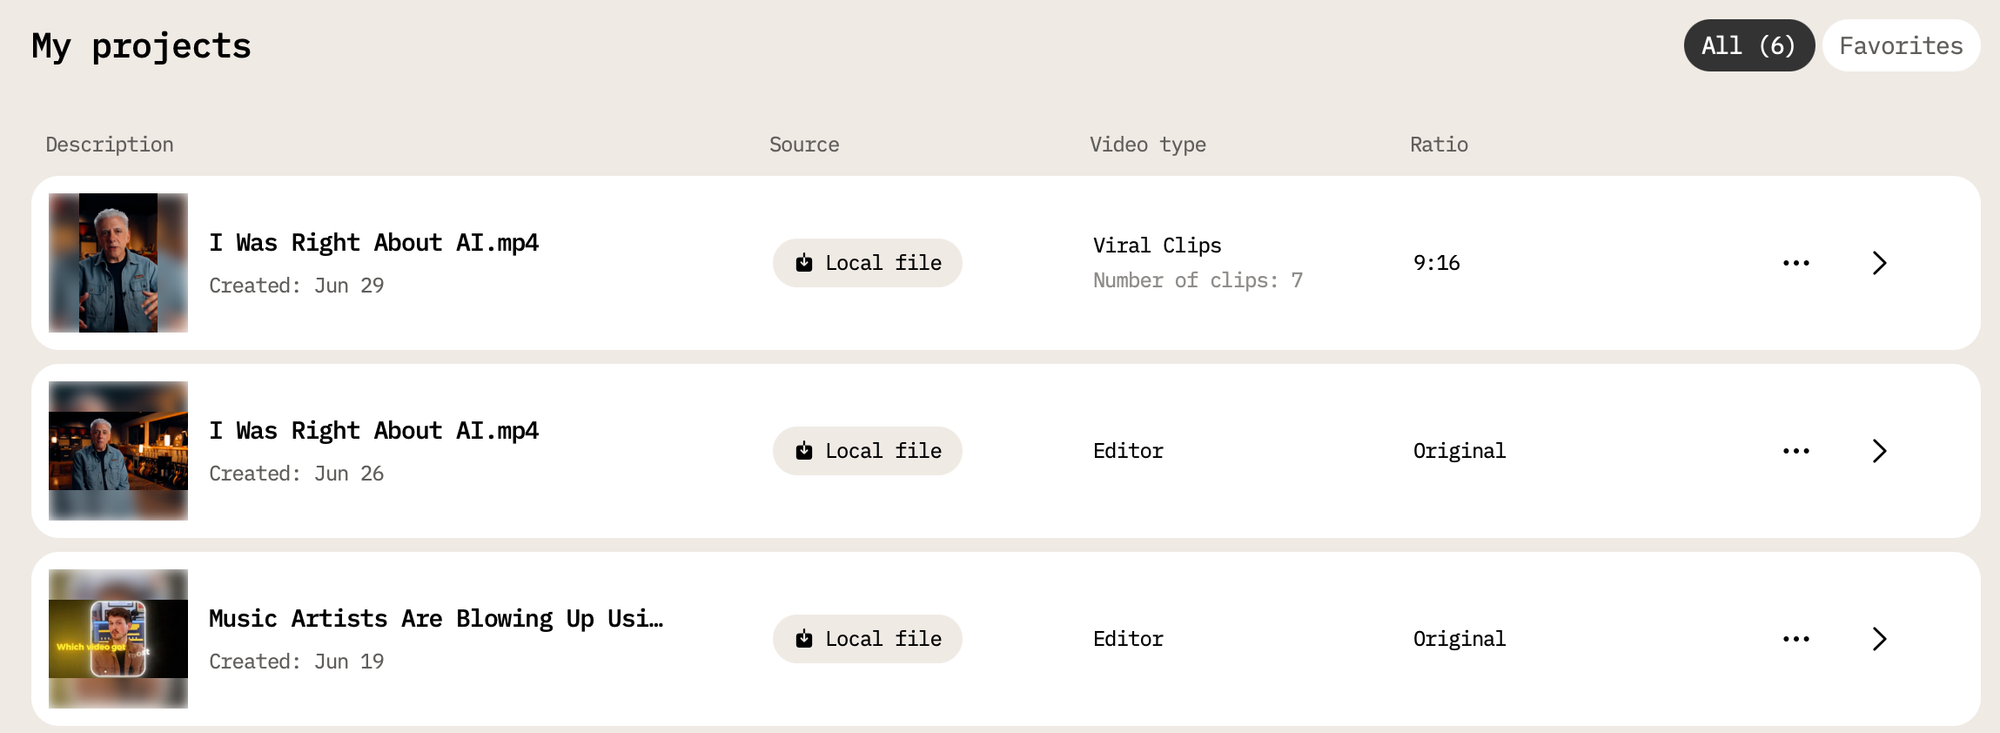
Step 6: Select one of the suggested output types and hit the Regenerate button.
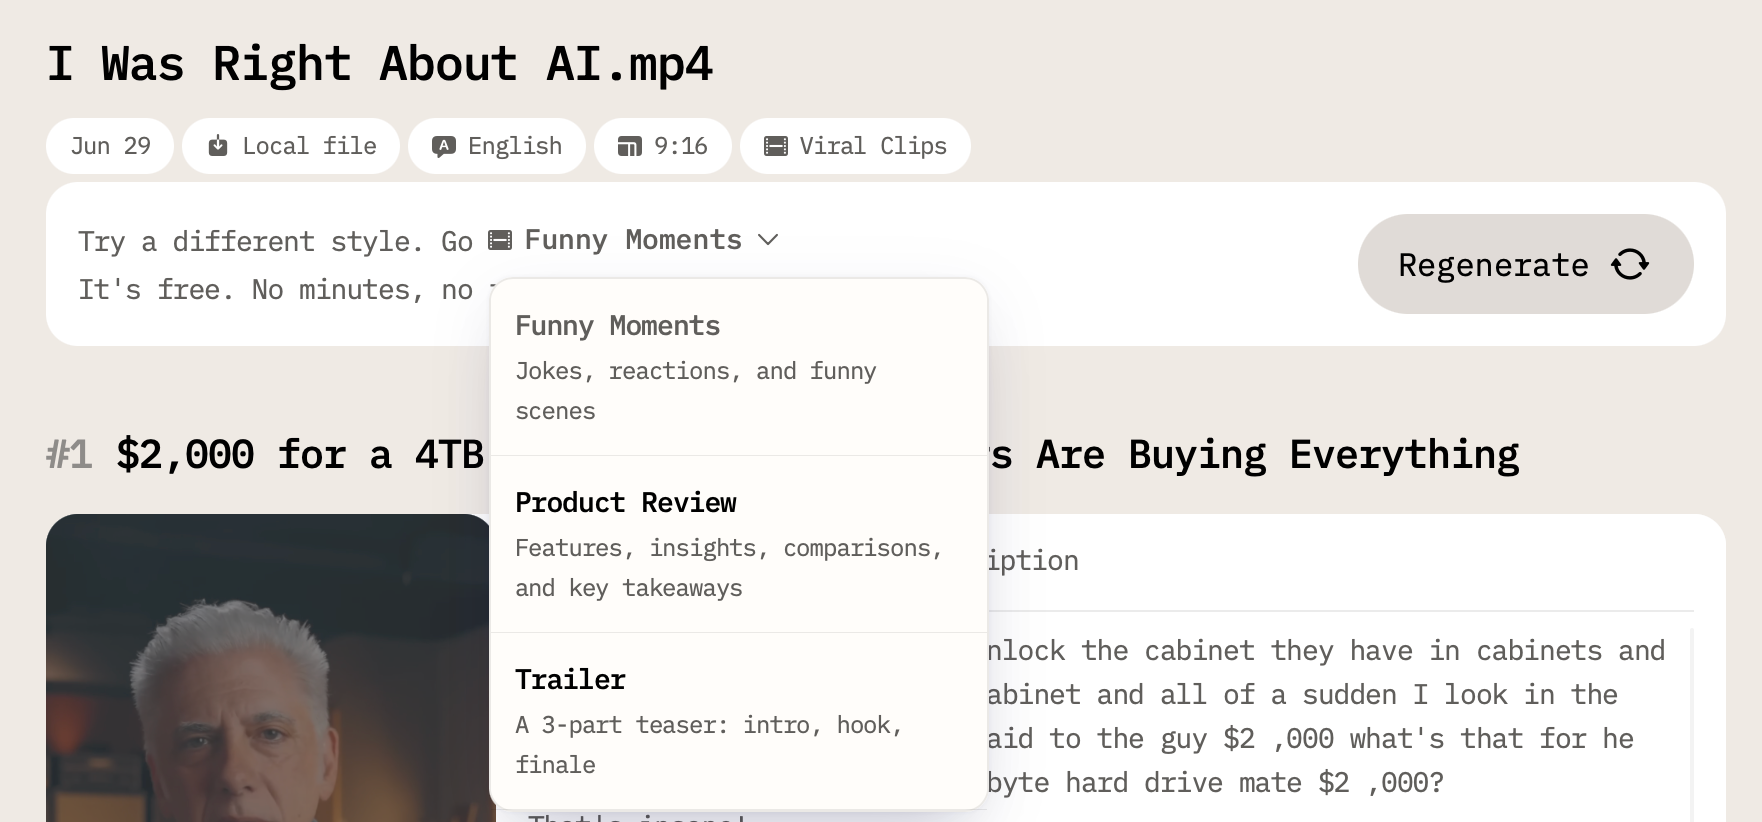
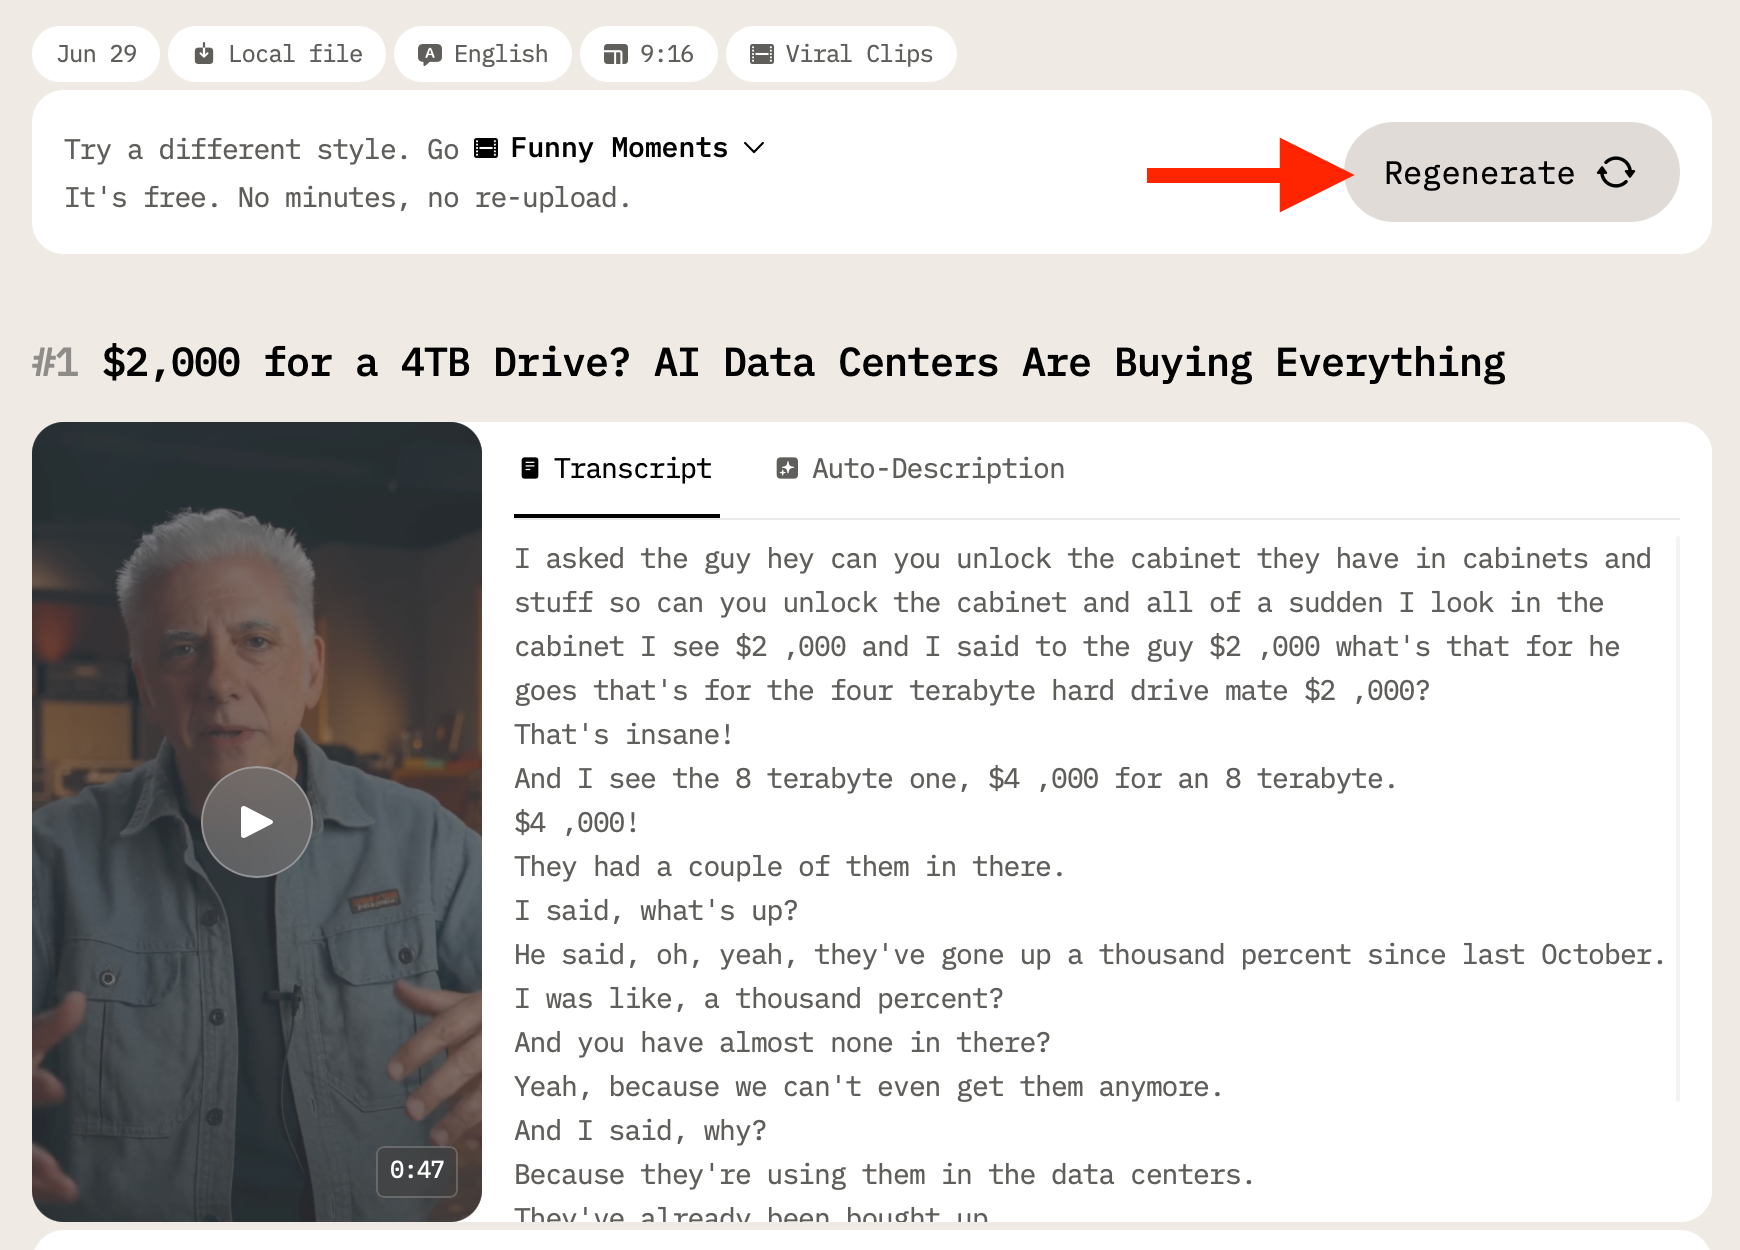
No worries, minutes won’t be deducted.
Step 7. Once you’re satisfied, click Download and share your optimized short video wherever your audience lives: TikTok, Reels, Shorts, or beyond.
Regeneration Limits: Free vs. Pro
Here’s how many times you can regenerate a video without using up your account minutes:

Once you hit your regeneration limit, any additional regenerations will consume your remaining video minutes. So plan accordingly!
Final Thoughts
Regeneration gives you creative flexibility and control over how your clips look and feel. It's especially useful if you want to repurpose the same long video for different formats or audiences, need to fix or change elements without re-uploading or simply experiment with viral clip strategies, meme formats, or multiple campaign angles.
In short, it’s your second (or third, or even fourth) chance to get the perfect cut, with no extra uploading required and no credits deducted from your account.
Ready to give it a go? Log in to AI Video Cut, upload a video, and see what Regeneration can do for you.
AI notice: This feature uses AI technology to process your video files.